ilinks

ilinks

About

Showing posts with label windows 7. Show all posts

Thursday, 20 June 2013

Change Logon Screen For Windows 7

windows 71
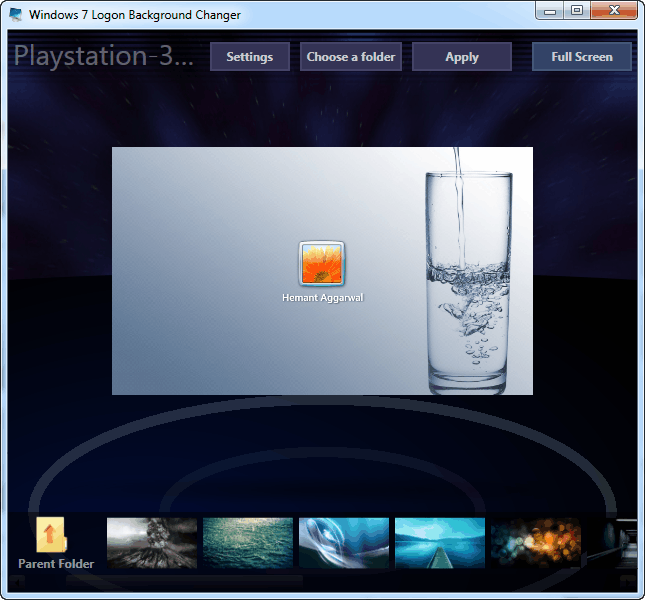
Changing Windows 7 logon screen (Welcome screen) manually is not an easy task. To make it easy we have a software called “Windows 7 Logon Background Changer” which seamlessly does this for you. The application is open source and lets you specify any folder from which you want to set the background. It displays the exact look which you will have after you apply the background.
change logon screen windows 71

What Windows 7 Logon Background Changer Does :

  • Download Windows 7 Logon Background ChangerDoes not change any system file.
  • No technical knowledge required.
  • You can prevent other users from changing the logon screen background
  • Automatically creates JPEG files of the background you select.
  • Automatically crops and re-sizes the image and applies the best compression.

Restart Your Windows PC Much Faster

WindowsNowadays we have only one button on our PCs and Laptops for starting or shutting down the PC. But on earlier Windows machines we used to have two buttons, one for the Shut Down and the other for Restart. This Restart button never closed any open application and thus was very fast. But in today’s systems if we Restart the computer with the Restart option, then it first closes all the open applications and then shuts down the computer, thus making it slow.

What’s The Problem And The Use ?

The button went missing but the feature is still there. Don’t know why Microsoft is hiding it. It is specially for those situations when an application is preventing Shutdown or you have saved all your work and need to restart your PC faster without Windows wasting time on closing applications. It is also helpful when a new software upon installation wants your system to be restarted.

How To Restart Windows PC Faster

  1. Press the Ctrl + Alt + Delete key combination.
  2. On the next screen hold the Ctrl key and press the Shutdown button on the bottom-right corner.
    Emergeny Restart
  3. Now Windows will show a warning that it will immediately restart the computer and any unsaved data will be lost. Press OK.
    fast restart warning
That’s it. Now your system will Restart faster than ever.
VERDICT
The emergency restart is quite powerful and should be used with caution. It is advised to double check if any of your open file has unsaved data, this is because the emergency restart will never give you any warning for your unsaved files.

Saturday, 22 September 2012

XP mode for windows 7

The new windows XP mode let you run the old Windows XP based software, right on your windows 7 PC. This is designed primarily with small and medium size business in mind. Windows XP mode comes as a separate download and works only with Windows 7 Professional, Ultimate and Enterprise . Windows XP mode also requires visualization software  such as Windows Virtual PC. 

  Windows XP mode is available only for the users who have a  Genuine version of windows 7 Ultimate or Professional or  Enterprise. For this Microsoft is using a technique called windows validation, in this process if they find the copy of your windows as genuine then only you will be redirected to the download link for windows 7 Virtual PC and Windows XP mode.

 Now as you know, you are at Hacking Guru so you do not need to fallow these processes, I am Providing The direct links for these applications,.....
   Remember,....
            First download Both Virtual PC and XP mode applications, and then

                  First install the Windows Virtual PC and then restart your computer,.
               
                 After that install the Windows XP mode,
This is it, now you can access Windows XP mode from Start-> Windows Virtual PC-> (Windows virtual machine->) Windows XP Mode.

below are the Download Links,...

Virtual PC Links:

Windows XP Mode Direct Download Links:

XP Mode BY Hacking Guru

Sunday, 9 September 2012

Use voice command to control windows 7

Three step guide to setting up windows speech recognition; become even more productive, using verbal commands to perform tasks simultaneously, or make life more interesting by being able to access and play your fevorite movie and music albums, write your word, excel or any other document or any other kind of thing with the sound of your voice

 One of the often overlooked feature available in windows 7 OS is speech recognition. Speech Recognition is a program that essentially allows you to use your voice to control your computer. Designed for people who want to cut down on there heavy  use of the carpal tunnel-inducing mouse and keyboard, Speech Recognition allows you to perform any task you might imagine.

Speech recognition allows you to dictate document and E-mails. start, exit, and switch between applications, control the OS, and even brows the internet.


when it comes to browsing the internet you can enter addresses, fill out forms, choose hyperlinks, open new tabs, scroll up and down web pages, and virtually all other important tasks you can think of.

Here are the steps,.

1. Go to Start> Control Panal> Ease of Access
Ease to access
voice recognition
2. Connect a Microphone
if you need help select "Set up a microphone" from the menu

3. Select "Start Speech Recognition"
voice recognition
voice recognition 1

That's it you are done
Start listening
voice recognition 2
Configure voice   Voice commands

Now fallow the instructions as it described in the tutorial(It will provide you a small tutorial  in the first step, if you are using this function first time on in this copy of window 7).

For more details about Voice recognition visit windows official site.
(If you have any issues or suggestion about this post, feel free to write in comment box,.  )

Monday, 27 August 2012

CMD Trick to change the color of command prompt and its text

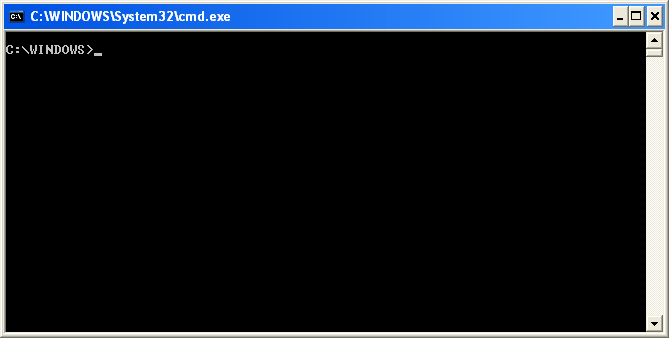
I thing maximum computer users know about the cmd and cmd prompt. In my previous posts I have discussed a lot about commands, but I am here again with a trick which can give a cool look to the cmd prompt, because Many of you may feel bored with the same black and white screen when working with command prompt,.
command Prompt screen shot
 So Here are the steps,.

Step 1:- Open CMD Threw Start program. 

Step 2:- Write "Color" (Without Quotation).

Step 3:- With Color You Have To Write Any Number Like "Color 1"
,"Color 2","Color 3" E.T.C. See Numbers With Colors Below

0 - black
1 - blue
2 - green
3 - aqua
4 - red 
5 - purple 
6 - yellow 
7 - white 
8 - gray 
9 - light blue 
a - light green
b - light aqua 
c - light red 
d - light purple 
e - light yellow 
f - bright white

Step 4:- After Write "Color 2" Press Enter. as shown in the figure,.  and you are done, 

Now one more trick i want to share with you
. All Website Has Their Own IP Address. We Can Open Any Website Threw Their IP Address.Hackers Used This Command For Hacking Website. If you want to find Out the IP address of an website then,..

Step 1:- Open CMD Threw Start program. 

Step 2:- Write "ping" And After Any Website URL. EX."ping Google.com"

Step 3:- Then Press Enter.As you can see in the above picture.

Thanks for visiting, subscribe this blog for the latest updates in your inbox, and don't forget to like and share this with friends,.                   

Saturday, 11 August 2012

S0ME useful RUN commands for your Windows PC

Just go start,then click on Run then type any comand below , or press the 'R' while holding the windows key, 

 
0) cmd - comand prompt

1) compmgmt.msc - for computer managent
2) devmgmt.msc - device manager
3) regedit - registry editor
4) msconfig - system configuratn utility . . .  
5) compmgmt.msc - Computer management

6) devmgmt.msc - Device manager
7) diskmgmt.msc - Disk management
8) dfrg.msc - Disk defrag
9) eventvwr.msc - Event viewer
10) fsmgmt.msc - Shared folders
11) gpedit.msc - Group policies

12) lusrmgr.msc - Local users and groups
13) perfmon.msc - Performance monitor
14) rsop.msc - Resultant set of policies
15) secpol.msc - Local security settings
16) services.msc - Various Services
17) msinfo32 - System Information
18) sysedit - System Edit
19) win.ini - windows loading information(also system.ini)
20) winver _ Shows current version of windows
21) calc - calculator

Windows 7 enable God mode


How to Enable God Mode in Windows 7
Windows 7 is the smarter and faster operating system developed by Microsoft. There are many setting options available in the Control Panel of Windows 7, but sometimes it is difficult to find the perfect s
etting option. If you have to change a lot of settings in your Windows 7, then it will take a lot of time in Control Panel, so here I am   sharing a trick in which you can do all the settings of Windows 7 like you do in the Control Panel directly from a single window. The trick is very easy, you just have to create a folder and that folder will work as Settings pane. People call this trick as Windows 7 God Mode.

Steps to Create a Folder:

1.Create a new folder and name it anything.

2.Now, rename the folder by pressing F2 or Right-click>>Rename and give it this new
name: Settings.{ED7BA470-8E54-465E-825C-99712043E01C}

3.After renaming the folder, its icon will be changed. Double click the folder to open it.


Now, you will see a screen like below. Here, you can change all the settings of your Windows 7 OS.

Sunday, 5 August 2012

Dual Boot Leopard and Windows Vista


Here is a complete guide to get a Dual boot setup with Windows Vista, 7 and Leopard running side by side. Please note this is a complete tutorial and if followed exactly you should be running Leopard and Vista side by side without any problems.
osxleopard
Well before we proceed with the guide, here is the stuff that you will need for a successful dual boot setup.
  • Vista or 7 (Ultimate) Already installed on your Primary Hard Disk.
  • iATKOS v1.0 DVD. (Do not ask me where you can download this)
  • Windows Vista, 7 Boot DVD (Just incase something goes wrong)
Well now that you have everything ready, lets get started then. Please note this is going to take sometime, here we go……….

  • Install Vista or 7(Ultimate) on the First Partition of your Hard Disk. I am not going to elaborate into How to install Windows, I hope everyone knows it. If you already have it installed then read on..
  • Right click on My Computer and Click on Manage. Select Disk Management. Now Create a new Volume for OSX by shrinking an existing volume. You need atleast 5GB of space and the new volume should show up as Unallocated.
  • Make sure that the partition shows up as Unallocated, else repeat the previous step.
  • Now restart the machine and boot into the Leopard DVD that you burned using the iATKOS v1.0 DVD Image.
  • Press F8 as the countdown begins and type -v at the prompt and hit enter.
  • You should see scrolling text on the screen now. If it stops anywhere then drop a comment and I’ll try to help you out.
  • After a while you should be looking at the Leopard Installer. Follow the instructions on Screen.
  • Once the Loading Bar vanishes Select Utilities -> Disk Utility .
  • Select the Volume you created previously and format it as MAC OSX Journaled Extended. Once the formatting is done the volume is ready for installation.
  • Now Close Disk Utility and Select Utilities -> Darwin Boot. Type Y at the prompt.
  • At the prompt when it asks for the Disk Number enter 0. For the Partition Number if your Leopard Partition is 2nd on the disk, then enter 2 and so on.
  • Accept the following prompts and you should see a success prompt saying that so many block of data were written successfully.
  • Now get back to the Leopard Install Screen. Choose the partition that you made in the beginning and follow the instructions on screen.
    Please don’t select any patches etc during the installation, this is normally the reason for most failed installations. Just the plain install would do.
  • Once the Install is done, reboot with the DVD in the drive. Press F8 at Darwin Boot Loader and type-s and press enter.
  • Execute the following commands :
    fdisk -e /dev/rdisk0
    flag 1
    quit
    reboot
  • Now before the PC restarts remove the DVD. At this point you should be able to boot into Vista normally.
    Note: If you are unable to log into windows, because there is an error which says ‘winload.exe’ correupted.! Relax. Just insert the Windows VISTA boot DVD into the drive and restart. Click on ‘Repair computer’ once you are inside the DVD and it will automatically detect if a problem exists and suggest ‘Repair and Restart’. Press the same, and remove the DVD once the PC is about to restart. You should now be able to log in to vista without any problem.
  • Now that we have almost everything running fine, lets proceed with the dual boot setup.
  • Boot into Vista. Copy the chain0 file from the Leopard DVD to C:
  • Open the ‘Command prompt’ with ‘Elevated Admin’ privileges from the Start Menu.
  • Type the following into the prompt
    bcdedit /copy {current} /d ‘Mac OS X’
    bcdedit /enum active
    bcdedit /set {GUID} PATH \chain0
    In the first command type {current} as it is, literally..nothing else..just {current} with the brackets. In the 3rd command however, replace the {GUID} with the alphanumeric GUID you see in the enumerated list under MAC OS X. You can see this list on your terminal as soon as you type the 2nd command above.
  • Close the Command Prompt and Restart Vista.
  • You Should now be looking at a screen with two options to boot into Mac OSX or Vista.
  • Select Mac OSX to see if you can boot into it. You should see the familiar Darwin boot Loading screen with the timer going down. If you dont do anything, then it counts to zero and again shows the menu screen with Vista and MAC OSX options. Dont panic!
    Again select MAC OS X, and now as the timer counts down, Press F8. You would see a list of partitions on your disk with their names. Select the partition with MAC OSX installed by using up/down arrows and press ENTER.
  • Voila!! your Mac should be booting up as you read this..
See it was that simple. No more HFS+ and Blinking Cursor errors. Just follow this guide step by step and you should be able to dual boot Windows Vista and Leopard in no time. If you have any questions just drop in a comment, I’ll reply at the earliest.
For Drivers and Patches I suggest you look at the InsanelyMac Forums. This guide would have been nearly impossible without :
  • Uphuck Forums
  • InsanelyMac Forums
  • OSX86 Wiki.

Sunday, 22 July 2012

Windows Loader v2.0.9 Genuine Crack, Activator For Windows 7

Window loader is an application used to bypass WAT (Windows Activation Technologies). The application itself injects a SLIC (System Licensed Internal Code) into your system before Windows boots , because of which your windows behaves as a genuine copy. In presence of a loader, Windows fail to check if the windows is activated with Genuine license key or fake.


Operating Systems Supported By Windows Loader:


  • Windows Loader Crack Activate WindowsWindows 7 Ultimate
  • Windows 7  Ultimate E
  • Windows 7 Professional
  • Windows 7 Professional E
  • Windows 7 Home Premium
  • Windows 7 Home Premium E
  • Windows 7 Home Basic
  • Windows 7 Starter
  • Windows 7 Starter E
  • Windows Vista Ultimate
  • Windows Vista Business
  • Windows Vista Business N
  • Windows Vista Home Premium
  • Windows Vista Home Basic
  • Windows Vista Home Basic N
  • Windows Vista Starter
  • Windows Server 2008 Enterprise
  • Windows Server 2008 Enterprise (Hyper-V)
  • Windows Server 2008 Foundation
  • Windows Server 2008 Standard
  • Windows Small Business Server 2008
  • Windows Storage Server 2008 Standard
  • Windows Server 2008 R2 Enterprise
  • Windows Server 2008 R2 Foundation
  • Windows Server 2008 R2 Standard
  • Windows Small Business Server 2011 Standard

Note : Turn Off your antivirus before downloading and turn it on after installing the loader.
Compatible with both 32 and 64 bit systems.
Download  below


First Link     OR        Second Link

Sunday, 10 June 2012

Hide Any local disk in Windows PC

Hi, friends, we already posted some tricks to hide the drive or lock any drive of your pc. But today I have a brand new trick to hide any drive in windows pc with a new method. This trick is very easy and I have been given some steps which make it more easier for you. Just follow these steps to hide your LOCAL DISK in your windows pc


STEP 1.-
First of all decide that which disk you want to hide [e.g I want to hide LOCAL DISK (K:) ]


STEP 2.-
Now just click on start button or press windows key on your keyboard. Here you'll see "COMPUTER" on right side.


STEP 3.-
Now move the cursor to it and right click on it.


STEP 4.-
Here you'll see "MANAGE" option , just click on it.


STEP 5.-
Now a new window will be opened as shown in below screenshot.


STEP 6.-
Here in left panel you'll see an option of DISK MANAGEMENT, just click on it and you'll get details of all LOCAL DISK present on your PC.


STEP 7.-
Now just right click on that disk which you decided to hide in STEP 1.


STEP 8.-
Here you'll see some option after doing right click on any drive, now just choose "Change Drive Letter And Paths..."


STEP 9.-
After doing step 8, you'll get 3 option ADD, CHANGE & REMOVE. Just click on REMOVE and hit enter.


You HAve done.
See your drive has been hidden..


[Note- IF you want to show the hidden drive then just follow same steps upto STEP 9. And this time choose option of ADD and choose your drive letter and u have done. See your hidden drive is back.]


Thursday, 24 May 2012

Install Multiple Operating systems In a single hard disk


This tutorial explains installing more than one operating system (OS) on a PC (i.e., dual booting, triple booting).


Introduction/Overview:
At times, you just want to run a certain program in Windows 98 or Windows 2000. Most users have a separate PC with one operating system installed. However, this tutorial will explain how to set up multiple operating systems on one PC.
Requirements:
-Basic knowledge of installing an OS. (If you need more information on this topic, please see specific Tech-Recipes tutorials that explain the process in detail.)
-Setup disks for each OS or a custom bootable DVD (with all operating systems on it)
-Bootable Windows 98 floppy disk
-60 GB of free, unpartitioned space (best size for partitions:
15 GB for Windows 98, 20 GB for Windows 2000, 20 GB for Windows XP Professional)
-Multiple partitions (We will need to be sure to install Windows 98 to the C: drive.) or multiple hard drives (not covered, but briefly explained)
For this tech-recipe, I am recommending you do a COMPLETE backup of all your personal files; and starting from scratch, conduct a clean install to avoid frustration.
Also, if you are using this tutorial as a guide, be sure to print it out.
Step 1. Preparing Hard Drives for Multiple OS’s
The first thing we will do is delete your partitions.
a. To do this, we will need to change the BIOS/CMOS settings so your PC will boot to floppy first.
b. Insert the Windows 98 boot disk, and reboot your PC.
c. It will bring up a Windows 98 Startup Menu screen. Choose the first option: Start Computer with CD-ROM Support. The boot disk will load and eventually return to a DOS prompt ( A:\).
d. At the A:\ type FDISK and press Enter.
e. This will now load the FDISK utility. The first screen might ask you “Do you wish to enable large disk support?” Choose Y for yes. Also, if your C: was formatted as a NTFS drive vs FAT32, it might also ask you if you want to treat non-FAT drives as unknown or something else. Again, choose Y for yes.
Now, you should be at the FDISK menu.
f. The first thing we will do is [4] Display Partition Information to see what we have set up and what we need to delete.
g. Once we see what we have set up, Esc back to the Main FDISK menu. Then go to [3] Delete partition or Logical DOS Drive.
Now, it will bring up the following four options:
1. Delete Primary DOS Partition
2. Delete Extended DOS Partition
3. Delete Logical DOS Drive(s) in the Extended DOS Partition
4. Delete Non-DOS Partition
When you delete partitions, here are some basic guidelines.
The order to delete partitions is as follows (first to last):
-Non-DOS > Logical DOS Drive(s) > Extended DOS Partition(s) > Primary DOS Partition
-If you have any NTFS drives, if possible, try to delete them in Windows before booting to floppy. It makes life easier, especially if the partition is created in an Extended DOS Partition. When trying to delete them from FDISK, you might receive the notice, “Cannot Delete Extended DOS partition while logcal drives exist.” However, when you try to delete the logical drive, your PC indicates that none exist. (I will explain how to avoid running into this problem in the creating partitions section.) If this is the case, go ahead and quick start install XP. Once the XP setup gets to the disk part, delete the NTFS partition from there, and then start your whole installation from scratch again (Delete all partitions and create new ones.).
Once you have deleted all of the partitions, go back to the main FDISK menu. Proceed to the next step.
Step 2. Creating Partitions with FDISK (A 60GB or greater hard drive is recommended for this.) As an example, I will use a 60 GB hard drive.
a. First, let us decide how many operating systems we want to be able to use on this PC (of course, only one at a time). In this tech-recipe, I will use these 3 operating systems as an example because these usually are the three Windows operating systems most people use and need:
Windows 98 SE
Windows 2000 Prof.
Windows XP Prof
I have always used and recommended creating individual partitions for each operating system you plan to run. This way, there are no issues with pagefiles, directories, etc.
b. e should still be on the FDISK menu (below).
________________________
Choose one of the following:
1. Create DOS partition or Logical DOS Drive
2. Set active partition
3. Delete partition or Logical DOS Drive
4. Display partition information
Enter choice: [1]
Press Esc to exit FDISK
_____________________
c. Go to [1] Create DOS partition or Logical DOS Drive and pressEnter.
d. Then go to [1] Create Primary DOS Partition and Enter.
If you have a Primary DOS partition, it will give you a message which reads “Primary DOS Partition already exists.” You will need to delete this. (put in italics, smaller)
e. It will now state that it is verifying drive integrity. Once it is done with this, it will ask the following:
“Do You wish to use maximum available size for a primary DOS partition and make the partition active (Y/N)?”
Choose N . (pic below):
________
Create Primary DOS partition
Current fixed disk drive : 1
Verifying drive integrity, 100% complete.
Current fixed disk drive: 1
Do you wish to use the maximum available size for a primary DOS partition
and make the partition active (Y/N) ………………..? [N]
________
f. It will now ask what size partition you wish to create, in either bytes or in percent (xx%). Also, you might notice that the space free/available might not match up with the size of your hard drive (if it is bigger than 20gb). This is because FDISK is limited to seeing up to 20GB. I typically create partitions based on percentage. In my example, I have 60 GB hard drive, so I am going to create this partition to be about 15GB (This will be my Windows 98 SE partition. I do not run many programs with Win98, so I probably only need about 10 GB.). So I would find out what percent of 60 GB is 15 GB.
After the math, 25% will equal approximately 15 GB.
Enter the percentage as follows: xx% . (Be sure to put in the % sign, or it will take the value as size in bytes.) Then hit Enter and it will create your partitions.
g. Once it finishes, it will bring you to this screen. Just ESC to the FDISK menu. At the bottom of the FDISK Menu, you should see the following message:
WARNING! No partitions are set active – disk 1 is not startable unless a partition is set active.
h. Go to [2] Set active partition, and enter the number of the partition set as active and press Enter. It will let you know that Partition 1 is now active.
i. Now, ESC go all the way back to to the DOS Prompt (a:\) and reboot your computer. Be sure to leave the boot disk in since we will need to format the drive we just created.
Step 3. Formatting the Drive / Pre-installation
a. Again, choose Start Computer with CD-Rom Support and let the boot disk load to the a:\ DOS prompt.
b. Now type: format c: and follow the prompts.
c. This might take a few minutes to complete. Let it finish.
d. After you have the c: drive formatted, we can start the installation of the first operating system.
Step 4. Installing the First Operating System
a. We should still be the a:\ after the format has completed.
b. We will need to go to the CD-ROM by typing e: and pressing Enter.
c. The prompt should change to e:\.
d. Now, we need to go into the windows 98 directory, and type cd win98 and press Enter.
e. The prompt will now change to e:\win98.
f. (Optional, but recommended) Enable smartdrv to speed up the installation. Do this by typing the following: smartdrv
Type smartdrv again to see if disk cache is enabled for the c: drive.
g. Now, at the E:\win98\ prompt, type: setup /ie
h. Go through the Windows 98 setup.
i. Once you are finished with the setup, Windows has to reboot. Reboot your PC, and be SURE YOUR FLOPPY IS not in the drive.
j. Go through the rest of Setup. You should now have Windows 98 SE installed on your C: drive.
Step 5. Installing Additional Operating Systems
INFO:
-When you setup your PC as we are now, the installation order of the operating systems is VERY important.
Microsoft recommends this order for installing OS, for multiple booting (first to last):
Windows 98 SE > Windows ME > Windows 2000 > Windows XP > Non windows OS (e.g., Linux, Unix, etc.)
Windows 98 SE is installed and running on our pc. The setting up of the remaining two operating systems will be simple since we can do the partition creation and formatting within the Windows 2000 / XP installation.
a. Insert your Windows 2000 Setup CD.
b. Go through the Setup Wizard
a. BE SURE TO CHOOSE installation type: Advanced (CLEAN/NEW, not upgrade!)
b. After Windows 2000 Setup copies the files to your PC, it will reboot into the installation program
c. When it gets to the choose partition to install, you will want to create a new partition and format it as FAT32 (You can convert it later on. This just makes things easier). Once it finishes creating and formatting the new drive (d:), choose that as the drive in which to install Windows 2000.
I recommend a 20 GB sized partition.
d. Go through the rest of the setup as normal
e. Once you reboot, it will come up with a “Choose Operating System” screen. Choose the Windows 2000 option.
f. Once you do, it will load Windows 2000 from the d:. Now, we will install Windows XP
g. Put in the Windows XP setup CD and again choose Advanced as installation type (not upgrade, since we want to install XP on a new partition).
h. Again, once it finishes copying files, Windows will reboot. If the boot loader shows up, let it load by itself. It should load up the Windows XP Installation Program.
i. Once you get to the drive location, we will create a new partition and format it as FAT32 file system. You can make the size of this drive to be whatever is remaining. (Be sure that you do the math prior to this so that this partition is at least 15 GB or more, depending on whether or not you have another hard drive in your PC that you have your music, personal files on. This is HIGHLY RECOMMENDED.).
j. Again, finish the install, and XP will be added to the Choose Operating System. Once you finish the setup of XP, you are good to go.
HELPFUL TIPS/NOTES:
-When you install programs for Windows 98, 2000 or XP, that program is ONLY installed for that OS, not for ALL of them.
-You can edit the order, labels, and timeout in secs of the booting of Windows.
In your Windows XP, right click My Computer > Properties > Advanced > Startup/Recovery. The top options are related to how Windows boots. If you click the Edit Boot.ini, it will open up the file in which you can remove items, edit, change, and add. Be sure you know what your changing before you do!
-DO NOT CHANGE YOUR PAGEFILE location! I did this once. It put my XP pagefile on the same drive as my Windows 2000 pagefile. Let us just say bad things happened.
-If you format your 2000 and XP partitions to NTFS, Windows 98 will not be able to see them (unless you have a program that allows for Windows 98 to be able to access NTFS drives).